Node.js has become increasingly prevalent in web application technology stacks in the recent years. Corporate giants like Netflix and Linkedin are now using it to drive a significant portion of their business logic, and the developer community has embraced the new technology with open arms. In addition to revamping the workflow of modern front end applications, Node.js is now moving in on the market share of more established server side scripting languages such as PHP, Python, and Ruby.
With a promising future ahead, various stakeholders of the web want to learn more about how Node.js works. Business’ want to see what advantages it could give them over their competition, experienced developers want to futureproof their skillset, and new developers want to learn a technology that is enjoyable, employable, and approachable.
The new ability to run Javascript server side grants organizations the opportunity to limit their applications to one single programming language and makes the title of “Fullstack Developer” more accessible to programmers that have thus far worked exclusively on client facing work. The considerable investment that Google has made on its V8 Javascript engine is taken full advantage of with Node.js, which stacks up well with other scripting languages in metrics of speed and performance.
With all these factors in play, how do you actually get your hands dirty and deploy a Node.js app to the web? Despite being largely beginner friendly, deploying serverside Javascript can be tricky, especially if you have requirements similar to mine – here’s the list:
- Since these are personal projects, they shouldn’t be expensive (ideally cheap or free).
- The project should be easily deployable based on a remote git repository.
- This git repository should be publicly viewable (so others can see your work) but should not compromise security (no leaked credentials).
- Although the app isn’t expected to get much traffic, it should still be fast to the visitors that it gets.
- The app should be served over https and use a custom domain name.
- Adding additional apps to the platform should be simple and inexpensive.
These six requirements are ambitious but attainable. This posts explores how these objectives can be met in part with Heroku and in full with Digital Ocean.
Heroku
There is a lot to like about Heroku as a developer. The platform offers a robust command line tool that allows you to manage your Node app from a local terminal window (although many things can also be achieved through their web based UI), manages the bulk of the dev ops tasks for you, features an extensive list of add ons (services like a MySQL or MongoDB database, for example), and provides comprehensive documentation. In it’s basic form, deploying Node to Heroku is fairly easy (Full details can be read at https://devcenter.heroku.com/articles/deploying-nodejs.):
- Develop your app locally
- Version control you app with git and commit the code that you want to be deployed.
- Download Heroku’s command line tool and run
heroku createfrom the root of your project - Create an npm script that starts your app (eg
node app.js) in your package.json - Declare your preferred version of Node.js (a sensible choice may be your local version)
- Push to Heroku’s remote repository (eg
git push heroku master). You should now see a series of deployment commands execute and a live url if everything went smoothly.
At this point, you have a basic node process running, but you will likely need to have a database available as well. You have a few options here:
- The most straight forward option is to use an appropriate Heroku add on (eg MongoDB, https://elements.heroku.com/addons/mongolab). This can be done with the heroku cli (
heroku addons:create mongolab:sandbox). Heroku offers a free platform up to this point, but often requires a credit card for addons. - If you prefer, you may set your database to run external to Heroku. In the case of MongoDB. you could create a service directly with MLab (https://mlab.com/), for example.
Notice that a remote database is required for both of these options. Since the app cannot simply access its data over localhost (because they are running on different computers) credentials are required, and these need to be managed in a secure way.
The most natural way to handle this with Heroku is through environmental variables. Environmental variables can be created and updated by command line or web interface:

These config vars should not be exposed in a git repository (It’s bad practise to store credentials in a private git repo, and a flat out security vulnerability to store them in a public git repo). Thankfully, Node.js features a native API that allows it to read the environmental variables of its current process. Here’s a basic example:
const dbUrl = process.env.DB_URL || 'mongodb://localhost:27017/my-app'
mongoose.connect(dbUrl)
On the first line, Javascript will check the value of DB_URL. If it finds it to be truthy, that value will be assigned to dbUrl. If it is not found to be truthy, then the local url (‘mongodb://localhost:27017/my-app’) is assigned instead (Note that this use of the || operator is somewhat Javascript specific and doesn’t extend to PHP, for example). This pattern is compatible with both the local and production environment, and keeps credentials secret.
With the problem of database connections solved, a fully functional Node.js app is now running on a public facing url! Further changes can be made by simply pushing subsequent commits to the Heroku remote repo, and additional services can be added to the app as needed.
Issues
Unfortunately, Heroku is not able to simultaneously meet all six requirements initially outlined. Although it offers a free tier to get started with, this basic plan only allows for a finite amount of monthly run time for you applications. The practical implication of this limit is that Heroku applications running on the free tier will “spin down” after a certain period of inactivity and then “spin up” again when a request is made, which often makes for very slow responses (~ 5s + in my experience). A load time of this length is so slow that a significant portion of would be users will simply bounce.
In addition to this primary performance issue, the inability to put a Node.js process on the same server as its pairing database introduces unnecessary network latencies and further hinders app performance (albeit to a much less extent).
Digital Ocean
Digital Ocean (DO) also offers application hosting, but provides a platform very different than Heroku. Unlike Heroku, DO allows you to do whatever you want with the server, and gives you this freedom at a lower price. Although this sounds nonintuitive at first, it’s important to acknowledge that this is also a liability. Although DO offers an assortment of “1 click” installation packages, you ultimately become responsible for the Dev Ops of your own VPS (Virtual Private Server) which is often tedious, error prone, and confusing for new developers.
That being said, DO can be configured to serve as a perfect hobby server to host personal projects of various tech stacks on a single VPS. There are many ways to do this, but this post shows how to create a Ubuntu Nginx/Apache server that serves Node.js applications on virtual hosts.
Getting Started
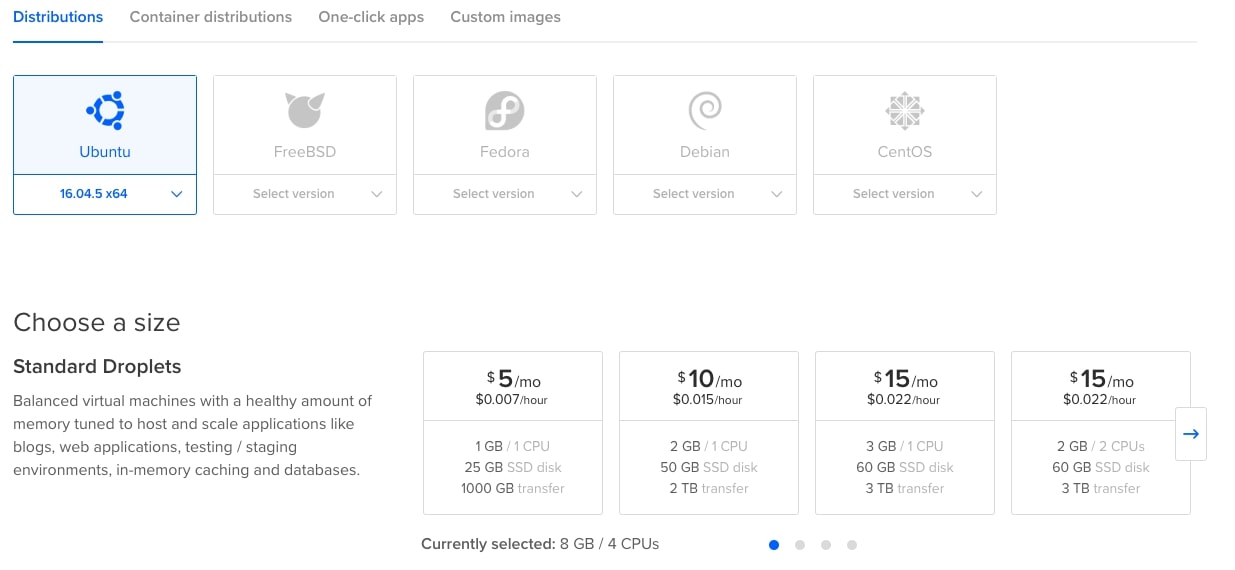
DO supplies Droplets as their basic unit of computation. A Droplet is essentially a virtual computer that serves as a workspace for whatever you wish. Once you signup for DO you can create a Droplet, specifying the operating system, computation power, etc. For the purpose of prototyping Node.js projects, a 1GB CPU (the most basic option) running Ubuntu is sufficient. This option costs 5USD/month currently. Virtually hosting can be leveraged to deploy all of our applications to this single droplet.
 Once you’ve selected your options and spun up the virtual machine, you will be given SSH access. From this point forward all the configuration for the server is done via CLI. Fortunately, DO provides comprehensive documentation that makes our setup much easier. This can be handled one step at a time:
-
- The preliminary step is connecting to your VPS as root via SSH. This is straight forward on Mac and Linux, but if you are on Windows you may need to use a tool like Putty. DO gives help with this step here: https://www.digitalocean.com/docs/droplets/how-to/connect-with-ssh/
- Although logging in as root initially is unavoidable, it is considered good practise to create a new user to be used for most operations. This can be achieved by following this guide: https://www.digitalocean.com/community/tutorials/initial-server-setup-with-ubuntu-16-04.
- Once a non-root user is available to be used, Node.js can be installed. DO recommends PM2 here as a means of running the app. While it is possible to temporarily run a server directly (eg
node app.js), DO suggests PM2 as a means to run the app as a service. This allows you to logout of your droplet without stopping the app, and sets the app to restart after a fatal (500) error occurs. More information can be found at: https://www.digitalocean.com/community/tutorials/how-to-set-up-a-node-js-application-for-production-on-ubuntu-16-04 - (Optional) Following the steps of the link provided above will yield Node.js app being publicly exposed through an Nginx reverse proxy. Although Nginx outperforms Apache for serving websites to many users simultaneously, this isn’t a critical consideration for a hobby server and I’m partial to Apache. If you want to run Apache as a web server instead of Nginx, these links might be handy to you – https://www.digitalocean.com/community/tutorials/how-to-install-the-apache-web-server-on-ubuntu-16-04, https://stackoverflow.com/questions/14369865/running-node-js-in-apache
- Both Nginx and Apache traffic can be better secured by forcing all traffic to work on https. Let’s Encrypt serves as a way to do this for free: https://www.digitalocean.com/community/tutorials/how-to-secure-nginx-with-let-s-encrypt-on-ubuntu-16-04, https://www.digitalocean.com/community/tutorials/how-to-secure-apache-with-let-s-encrypt-on-ubuntu-16-04
- Unlike Heroku, DO grants us the flexibility of running our database management system from the same host as the Node.js server. As a single example, this article explains how to properly run MongoDB: https://www.digitalocean.com/community/tutorials/how-to-install-mongodb-on-ubuntu-16-04. Avoiding the network latencies inherit to remote database connections often come with noticeable speed improvements.
The server configuration process is now essentially complete and your app should be running soundly on a virtual host. With the exception of the points related to git, all the requirements have been met.
Digital Ocean Version Control & Deployment
Git can be used as a key tool for deployment, and a workflow similar to that of Heroku’s can be achieved by automating this process.
- First, prepare a remote repository for your projects code (eg Github or Bitbucket) and push your latest changes to that location.
- Install git on your droplet: https://www.digitalocean.com/community/tutorials/how-to-install-git-on-ubuntu-16-04. Once git becomes available, clone the project to its appropriate directory.
- The project can now be updated by simply pulling recent changes from the remote repository to the VPS. However, the process of connecting to a server by SSH, navigating to the appropriate directory, pulling changes, and possibly running a build script or package installer is tedious. This can be automated by creating a bash file – here’s an example:
#!/bin/bash

ssh 138.33.33.333 << 'ENDSSH'
cd my-project
git checkout .
git pull origin master
npm install
ENDSSH
This script can be triggered by running
./deployfrom the command line of your local machine (make sure it has appropriate permissions for executing). Deployment is now automated – this process will login to the droplet, find the appropriate folder, clear any local changes, pull new changes from the remote repository, and ensure that all tracked packages are installed. A build process may also be executed here (egnpm run build), which would permit generated files to be ignored from version control.
Managing Credentials
Credential management is left more open ended in DO than Heroku. One solution is using a package like dotenv (https://www.npmjs.com/package/dotenv) that allows for environmental variables to be defined in a separate file. A more minimal solution (which I prefer) is creating a conf.js file at the root of your project folder and excluding it from version control. It could look like this:
module.exports = {
    dbUrl: 'mongodb://localhost:27017/my-app',
    secret: 'Tony Hawk'
}
Including an example file (eg conf.example.js) in version control is a good idea. It serves as a reminder to yourself and allows other people to get a project running without thinking too hard. Once this is in play you can modify the app’s connection line as follows to make it compatible with local, Heroku, and DO environments.
const dbUrl = process.env.DB_URL || require('./config').dbUrl
mongoose.connect(dbUrl)
Conclusion
Heroku and Digital Ocean are two of the most common ways to host Node.js applications. Although many budget hosting providers do not provide the server side V8 runtime, Digital Ocean can be configured to run any number of apps on a single $5/month droplet that is easily deployable, secure, and reliable for modest load sizes. Heroku offers a sleek toolkit and solid hosting, but these feature will cost you – especially if you want to have several instances running simultaneously.